Mail forms
This is where you create a mail form for your customers to contact you through.
First click on "New E-mail form" This will open a new page displaying a few properties that need to be filled in. 
Type in the name of this form in the label section and then enter the email address you want the mail to go to and the email subject.
This section must be filled in or customer won't know where email has come from or where to reply to.
Specify what the submit button will display, for example "Send" or "Submit" and then specify the destination where the customer will end up after he has clicked on the link.
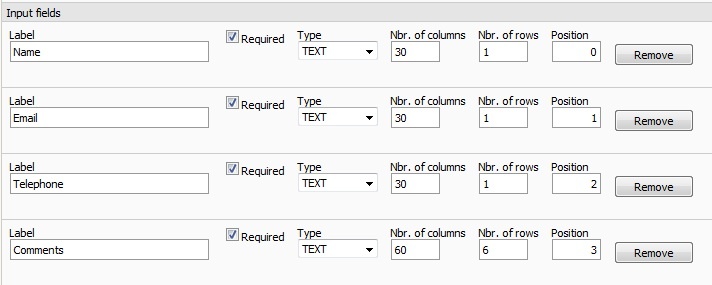
Next, you add the content of your forms from using Input fields or free text box. These are displayed on the left of your customer input box.
So this:
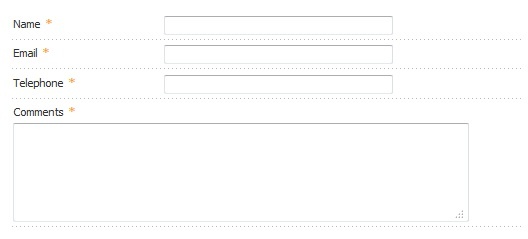
Will look like this on the mail form:
There are three types you can choose;
Feature |
What it does |
|---|---|
Text |
This is used when you want a field to plain text. Can be used to allow your customer to enter phone numbers, names, email, etc. The number of columns determines the width and number of lines determines the height of the field that the customer can write in. |
Select |
Used to create drop down menu with per-determined choices, In values, type in the options to select. You separate the options with the return key. |
CheckBox |
Used to create a tick box. |
You can then add this email form by going to Documents -> Documents. Select the page you want the form to be shown in. Then select "Add element" and then e-mail form. Browse to the form that you created and click "Save content".