Setting up Google Analytics 4 (GA4) requires several steps. Here's a basic guide to get you started:
Create a Google Analytics 4 Property
- Sign in to your Google Analytics account.
- Click on the Admin icon (the gear icon) in the lower-left corner.
- In the Property column, click on "Create Property."
- Choose "Web" to add your Nettailer.
Provide Property Details
- Give your property a name.
- Choose a reporting time zone.
- Enable or disable data sharing settings based on your preferences.
Data Streams
- After creating a property, you need to set up data streams. Data streams are sources of data, such as a website, app, or other digital platforms.
- Click on "Data Streams" in the property settings.
- Click "Web" for the your Nettailer.
- Follow the setup instructions provided for the specific data stream.
Add Tracking Code to your Nettailer
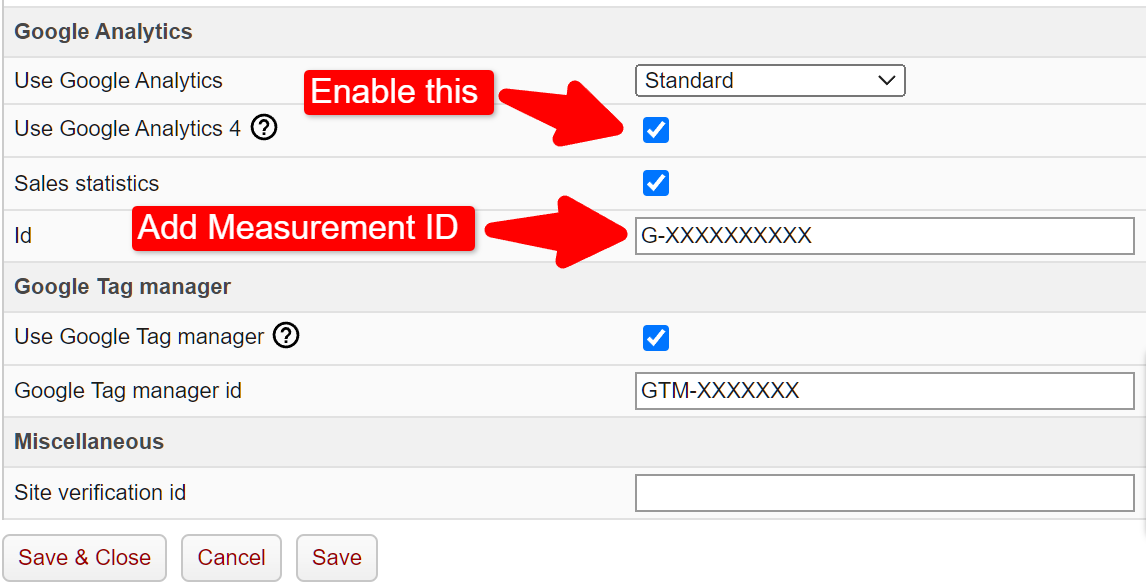
- For web properties, you will receive a tracking code (also called Measurement ID) that you need to add to your Nettailer pages. You can do this by enabling GA4 and adding the GA4 measurment ID to your store @ Settings > Google Analytics
- Once the tracking code is implemented, you can start collecting data in your GA4 instance. It may take a few hours for the data to populate in your reports.
That's it! You've successfully added a GA4 instance for your online shop.
Privacy and Compliance
Ensure that you are compliant with data privacy regulations, such as GDPR and CCPA. You may need to implement consent management tools for user data collection and retention.
Remember that setting up GA4 is just the beginning. To get the most out of it, you'll need to regularly analyze the data, refine your tracking, and adapt your strategy based on the insights you gain from the analytics.